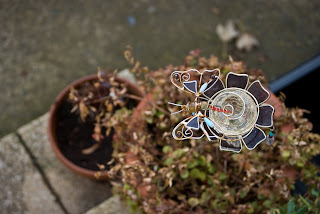
Planning composition in photography cannot be underestimated, however there are times when further adjustment is necessary after shooting I made the adjustments to this image using PS on the mac. In the original the poor dragon fly is a bit rusted and a bit drab, plus I an only so tall so am limited as to how much distance I can get when I used a zoom lens to increase the bokeh on the shot which is fairly close range.
The first, most obviously, adjustment to make here was the saturation of the coloured aspects of the ornament. This is fairly simple using the sponge tool on PS. I also emphasised its outline with the dodge to to brighten the edges. After this I wanted to increase the saturation in the background as it looked a little washed out, but without detracting from the ornament which is the focus of the shot. To do this I used the orton effect applied to the whole image, a tutorial on achieving this effect can be found through the title link. Before using this though I selected the dragon fly with an elliptical selection tool set to feather 20 pixels and copied it, after applying the effect I re-pasted the unaltered selection back in and flattened the image.
The first, most obviously, adjustment to make here was the saturation of the coloured aspects of the ornament. This is fairly simple using the sponge tool on PS. I also emphasised its outline with the dodge to to brighten the edges. After this I wanted to increase the saturation in the background as it looked a little washed out, but without detracting from the ornament which is the focus of the shot. To do this I used the orton effect applied to the whole image, a tutorial on achieving this effect can be found through the title link. Before using this though I selected the dragon fly with an elliptical selection tool set to feather 20 pixels and copied it, after applying the effect I re-pasted the unaltered selection back in and flattened the image.
No comments:
Post a Comment