After a horrible shock when I picked up my D300 yesterday and the AF had stopped working I had renewed motivation to go out & shoot, of course I have 2 children so what I did (after changing lenses in dis-belief a few times and fiddling enough to get it working) is stay in & shoot of course...
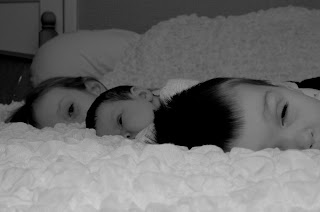
This was one of the resulting shots, the others were of flowers that I got for my birthday this week. This was shot with my 50mm f1.8 lens, my favorite lens of all time but doesn't quite do its capabilities justice. As I was infact shooting the real-life 5 year old daughter and not a stuffed version she moved all the time so rather than shoot at f1.8 like I'd like to I shot at f4 to give me a slightly deeper DoF and some error room for the endless 5 year old shuffle.
To edit this shot was all about layers. I liked the original so to preserve it exported from lightroom as a TIFF to PS and used adjustment layers to make sure I didn't do anything I couldn't get rid of.
First layer: sharpening. Duplicate the background layer + run high pass filter at 2 pixels. Then add an inverted layer mask and paint in the sharpening to the areas of the image you want it (white a soft white brush). In this case I painted in over the feather. Then switch the blending mode to hard light or soft light, whatever your preference.
Second layer: black + white conversion. In this image to enhance the contrast I lightened the yellows and darkened the reds, but only very slightly.
When I was happy with these the image was flattened and the background duplicated again. The duplicate layer I set to a blending mode of colour dodge which vastly enhances the highlight areas of the image, too much in fact. I added an inverted layer mask and using a soft white brush set to 35% opacity and 40% flow painted in the highlights I wanted to emphasise.
So all in all for a fairly simple black and white image it took much longer to edit than a standard portrait!
 Having a newborn in the house means I have an endless supply of cute photographic ideas to try out, sadly it also means I have a million reasons to end up being unable to carry them out!


.jpg)
.jpg)
.jpg)
.jpg)


.jpg)
.jpg)
.jpg)


